How to Take Notes in Audible
February 26, 2019
I like to read. And when I read, I take notes in my books so I can review them later (it also helps to keep me engaged while I’m reading). I bought a Kindle a few months ago and I wondered how I ever lived without one – it upgraded my note-taking workstream to a whole new level.
I used to be reluctant to listen to books on Audible. It seemed impossible to take notes. For a while, my solution was to use Clips while reading, then go back and listen to each one and type out the words as I was listening. Yikes.
I searched online and couldn’t find a solution to my problem. So I dove into the process myself and came up with a low-maintenance way to take notes on Audible.
Methodology
The process I began with did solve my problem. But it was not something I wanted to be doing every time – I needed a better system if I was going to use Audible in a meaningful way. I started by coming up with a list of qualities that my system needed to have:
- Automated – this was the main motivation. I couldn’t be typing in notes anymore; my new system had to be faster and had to remove my manual labor
- Cheap – then I ran into the issue of cost. A crude solution I toyed around with was to hire a TaskRabbit worker to come to my apartment, listen to my clips and type notes (as I had done before). Not only would this have been expensive, but also would’ve stolen a few hours from some poor soul who had to manually enter my book notes. I had to keep the cost low (or free).
- Involved – wait, didn’t you say you wanted it automated? What I mean here is that I didn’t want to be so far removed from the process that I lost the value of taking notes. There are benefits not only from re-reading notes months later, but also reviewing them after completing the book. I didn’t want to lose this part.
- Accurate – none of this makes any sense if the system creates inaccurate notes.
Step 1: Save Notes with Clips
Once you have your book selected, listen to the book like you always do. Except this time use the Clips feature to capture snippets of the book you want to remember:
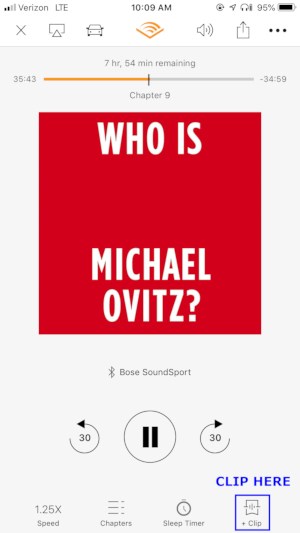
Once you Clip a part of the audiobook, you can add a note or preview it:

If you click preview, you can edit the clip further to add more / less than the stock 30 seconds. This is helpful for long passages (for passages shorter than 30 seconds I usually just edit in the web browser later).

Step 2: Record Screen
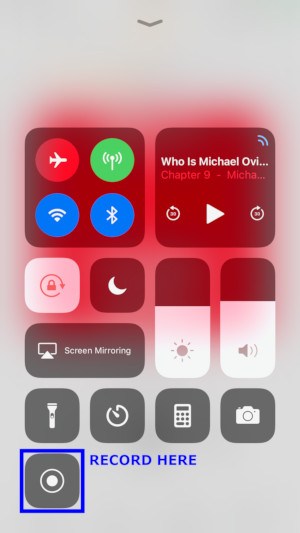
Once you complete the book, you have to combine the clips together. To do this, we are going to record your screen while playing the clips. Luckily Apple created the iPhone with a built-in recorder. To use it, you have to enable Screen Recording in the swipe up menu:
- Settings -> Control Center -> Customize Controls, then tap the plus sign next to Screen Recording
Once it’s enabled, swipe up and click the button with the dot in the middle. NOTE: once you do this you’ll start to record your screen, so have Audible ready.
Now, go back to the Audible app and play each clip, one after the next. Yeah, this takes more time than I’d like, but you don’t need to pay attention and it’s rarely longer than 10-20 minutes (depends on how many Clips you clipped):

Step 3: Convert to .mp3
Once you finish recording, you will have an entertaining video of you clicking “Play Clip” over and over again. The next step is turning this into an .mp3 so that a transcribing service can handle it.
There are lots of apps that perform this task – I use The File Converter. This app is easy to use: select your video from Photos (it will be in .mov format) and chose which type you want to convert it to (.mp3).

Once you press “Convert” it’ll do its magic and soon the video file will be an audio file. Great! Now we have an .mp3 of all our Audible clips, we just need a way to turn that into text.
Step 4: Transcribe from Audio to Text
My first idea was to hire someone off Fiverr to transcribe the audio to text. But why hire a human when a robot can do it cheaper? I looked at several NLP-driven products and found Trint to be my favorite. It’s easy to upload, very accurate, and painless to edit (plus you can adjust the playback speed!).
To begin, go to Trint‘s website and create an account. They have a free trial period so you don’t have to pay until you’ve seen the magic. Once you do that, go to the app store and download the Trint app so you can upload the audio files from your phone.
(Once you complete the Trint free trial it costs $15 for each hour of transcription. For me, the sum of all the clips from each book are around 15 minutes, so the cost each book comes to less than $4 on average. Not free, but cheaper than a Starbucks.)
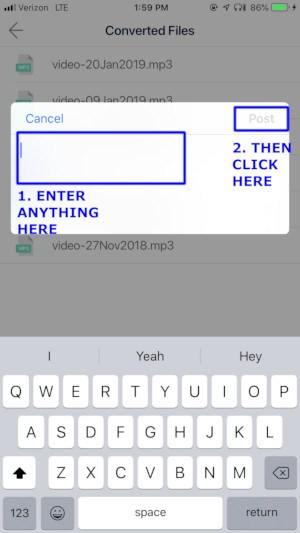
The best way to use Trint mobile is to send the audio files to the app. So hop back over to The File Converter, find the .mp3 file we created in the last step, and post it to the Trint app.

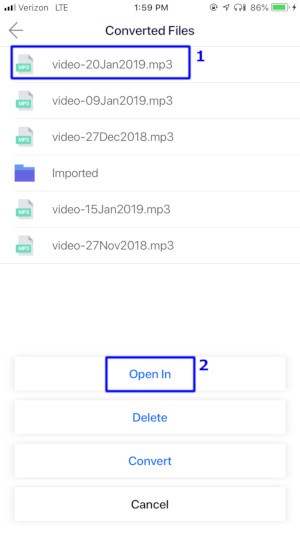

If you don’t have the “Send to Trint” icon, click on “More”, add it in, and go back to the beginning of this step.
Boom! Now sit back and relax while technology turns audio into text. Almost done…
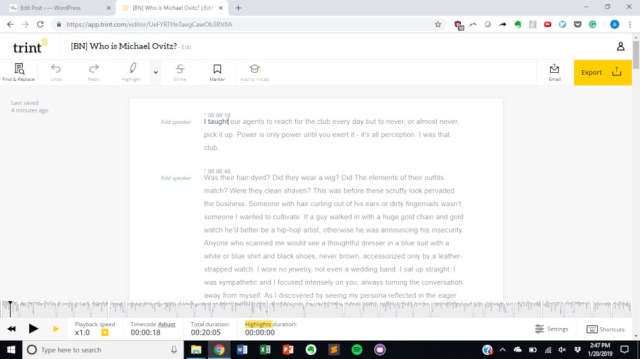
Step 5: Text Edits
NLP transcription is marvelous, but it’s not perfect. My favorite feature of Trint is the editing tool – it’s simple and works how you think it should. Open up Trint in your web browser, navigate to the file you uploaded, and listen to the audio to make sure the text matches.
Step 5 is the most time consuming, but I accept it on account of the Involved requirement. This is valuable time to review the reading material.
Once you’ve gone through the audio / text transcription, you have completed the final product. Nice job! Export the text to put on your website, in your personal notes, or wherever else you want to.
Enjoy reading this?
Join my newsletter! Each week I breakdown interesting finance and investing topics. I put in hours of research so that you can spend minutes learning. Unsubscribe at any time.